Dealer Meeting Production Checklist: Vehicle Reveals, Product Walkarounds, And Conference Load-In Logistics.

Chief Executive Officer
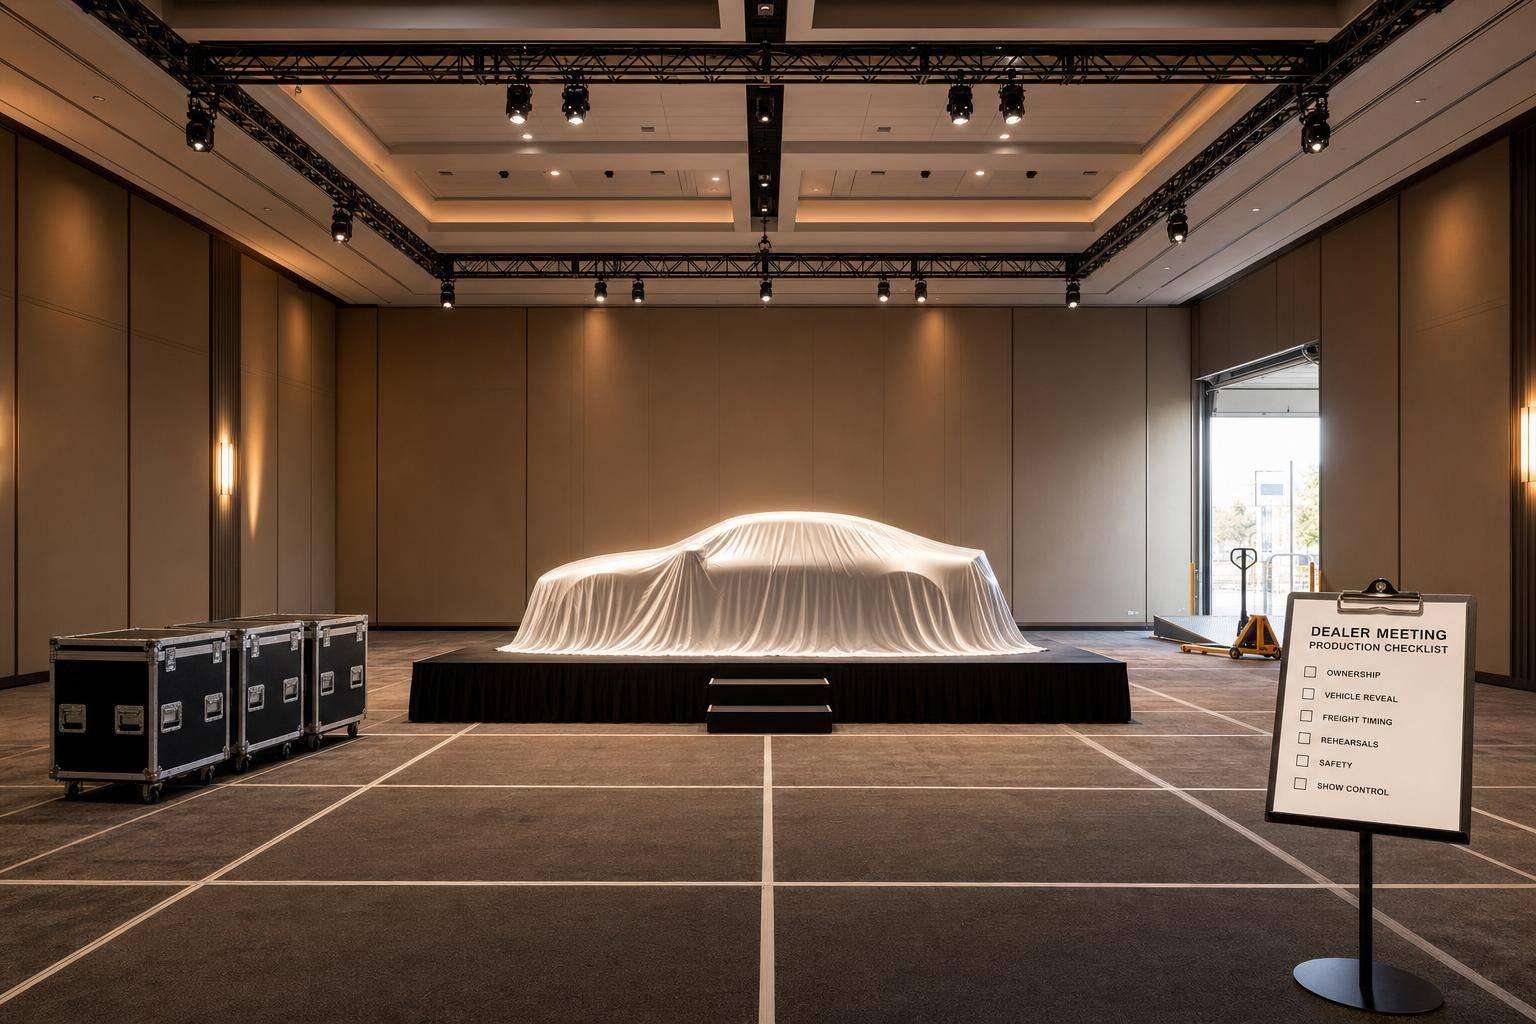
A dealer meeting usually slips for five reasons: no clear owner, bad freight timing, untested vehicle moves, weak rehearsals, or mixed file versions.
If I had to cut this article down to the part that matters most, it would be this:
- Assign one owner and one backup for every task
- Lock the show schedule backward from venue handback
- Test the vehicle route and reveal cues under show conditions
- Control dock access, freight receiving, and labor calls
- Finish technical checks before rehearsal starts
- Use one approved run of show and one cue set for all teams
The article also makes one point over and over: “ready” is not enough. An item is only done when it is verified on site, with the actual crew, gear, files, and vehicle.
A few details stand out:
- Fuel limits may be capped at ¼ tank or 5 gallons
- RF should be scanned 30–60 minutes before doors
- Adjacent wireless channels may need 1 MHz spacing, or 2–3 MHz in dense setups
- Some venue live-load limits can reach 150 lb/sq. ft. in ballrooms and 350 lb/sq. ft. in some exhibit bays
- Covered cable ramps should stay at a 1:3 maximum slope
- If slope is steeper, cleats should be no more than 14 inches apart
My takeaway: this is not just a checklist. It is a show-control plan for freight, staging, safety, rehearsal, live cues, strike, and venue handback.
If you want the short version, keep your focus on these four status labels only: Not Started, In Progress, Ready, and Verified. That one rule alone can stop a lot of day-of-show mistakes.
Section 1: Event scope, ownership, and show documents
Confirm the schedule, milestones, and venue handback time
Start with the first full rehearsal, then build the schedule backward. Begin at venue handback and work back through load-out, strike, show close, attendee departure, rehearsal, technical testing, installation, freight receiving, and crew call times. This makes dependencies easy to spot. Freight, installation, and rehearsal shouldn't be fighting for the same block if the plan already shows what has to finish first.
Each time block needs a clear status: locked, tentative, or pending approval. Cover the full operating window, from the first truck arrival to the final truck departure. So if doors open at 8:00 a.m. Thursday and the first full rehearsal starts at 3:00 p.m. Wednesday, the plan needs earlier deadlines for scenic completion, lighting focus, audio line checks, video playback tests, vehicle positioning, presenter blocking, and cue-to-cue rehearsal. That way, the team still has time to find and fix problems before rehearsal begins.
Use that timeline to map attendee flow and protect production zones.
Only map the attendee flow that affects production: arrival, registration, general session, vehicle reveal, walkaround blocks, meal breaks, and departure. Note who owns each transition and what happens if a segment runs long. Then show those paths on the floor plan so cable runs, vehicle zones, and backstage access stay protected.
Assign one owner to every department role
Every department needs one named owner and one backup. No TBDs. Before the document is final, every milestone in the run of show should already have one owner and one backup attached to it.
Required roles include the following:
- client lead
- producer or production manager
- show caller
- stage manager
- audio lead
- video lead
- lighting lead
- scenic lead
- vehicle presentation lead
- venue representative
- dock/freight supervisor
Names alone aren't enough. You also need to document who has decision power in each area. The client lead approves messaging and branding. The production manager or technical director approves technical execution. The venue representative approves building-related changes. The vehicle presentation lead approves vehicle access and movement. The show caller coordinates live cues across teams, while the stage manager controls talent flow and onstage logistics.
Add an approval matrix to the contact sheet with mobile number, email, radio channel, escalation contact, and availability windows during load-in, rehearsal, show, and load-out.
Lock these names before the run of show is final.
Build the master run of show and cue sheet
Treat the master run of show like the live script. Every timed action should tie back to an owner, a dependency, and a fallback.
Don't use one catch-all cue like "vehicle reveal." Break it into small, clear cues: presenter clear, audience hold, house-light change, music cue, scenic-open cue, vehicle-light cue, reveal movement cue, vehicle stop confirmation, and presenter release. The walkaround block should also spell out the presenter's starting mark, microphone assignment, camera or IMAG coverage, display lighting state, audience release, and the cue to return to the main stage.
Every cue needs a person running it and a backup plan. For example, if a motorized door fails, hold the audience, keep the vehicle still, and switch to a presenter-led verbal reveal or a prepared video asset.
| Field | What to record |
|---|---|
| Clock time | Planned start and end time for each segment |
| Duration | Segment length and any hard stop |
| Presenter/talent | Name, entrance point, exit point, and holding location |
| Mic assignment | Mic type, number, presenter, and backup |
| Technical cues | Lighting look, video roll, audio playback, scenic action, vehicle movement |
| Dependencies | Presenter ready, vehicle in position, file loaded, stage clear |
| Fallback | Spare mic, alternate file, verbal bridge, hold, or revised entrance |
| Revision/status | Version number, approval state, and last update |
After lock, send out role-based versions: a stage-management version, an AV cue sheet, a venue and freight schedule, and a presenter-facing schedule. Use one file naming format each time, such as DealerMeeting_ROS_v03_2026-09-30_1400ET, and require acknowledgment for any revision that affects vehicle movement, presenter entrances, stage traffic, or venue handback.
With scope, ownership, and cue structure locked, the next step is vehicle placement and load-in execution.
sbb-itb-ae35a94
Section 2: Vehicle reveal and product walkaround readiness
Verify vehicle access, movement, and stage placement
Once freight and labor are lined up, lock the vehicle move, reveal path, and final stage position before install begins.
Before the vehicle comes in, check its dimensions, weight, turning radius, ground clearance, and door clearance against every point on the route: the dock, hallways, freight elevator, ramps, and the stage approach. You also need the floor-load limit in writing. Then factor in curb weight, tire contact points, platforms, ramps, and floor protection. One convention-center ruleset gives example live-load limits of 150 lb/sq. ft. for ballrooms and meeting rooms, and up to 350 lb/sq. ft. for some exhibit bays.
Add a vehicle technical-information sheet to the production binder. It should list the make, model, dimensions, weight, fuel or battery status, key location, tire pressure, alarm status, driver, and emergency contacts. For display vehicles, follow the venue's written rules for fuel and batteries. One ruleset limits fuel to ¼ tank or 5 gallons, whichever is less, and does not allow refueling inside the building. EV and hybrid vehicles also need separate venue approval for battery isolation and charging.
Vehicle movement should be handled like a controlled operation, not a casual drive-in. Assign:
- one named driver
- a front spotter
- a rear spotter for blind corners when needed
- one person with stop authority
Set a pedestrian exclusion zone with barricades, not cones alone. Mark the approved drive path on the floor plan, including the final parking position, exit route, and any areas that must stay clear. Use one plain emergency command, such as STOP - STOP - STOP, that overrides music, presenter direction, and scenic automation. Run a dry-path test first. Then run it again with the vehicle moving at walking speed.
Program and rehearse reveal cues under show conditions
The reveal should run as one connected cue stack, not a bunch of separate moves. A typical sequence looks like this: standby all departments; clear the stage; fade room lights; start the reveal video; hit music; open the cover; bring up vehicle lights; stop the turntable at mark; bring up the presenter special; hold for applause; begin the walkaround.
Each cue needs a clear owner, trigger, backup, and abort condition. And the presenter should not step in until the lift or turntable has come to a full stop and the stage manager has called the stage safe.
Schedule at least one full-speed rehearsal to test timing and audience impact. After that, run a slower safety rehearsal focused on clearance, stop points, operator sightlines, and emergency steps. If anything changes, run both again. That includes changes to vehicle position, scenic speed, lighting, video, or music.
Lighting needs separate looks for each part of the segment:
- pre-reveal
- reveal
- hero vehicle
- presenter walkaround
- close-up feature demonstration
- audience Q&A
- transition to the next segment
Check every look from audience sightlines and from every planned camera angle. That’s the best way to catch glare and odd reflections on paint, chrome, glass, screens, and polished floors before show day.
Set up audio, video, and presenter marks for walkarounds
Once the vehicle position and reveal cues are locked, map the presenter’s path around the car.
Choose microphones based on blocking. A headset gives steady level. A lavalier gives a cleaner visual. A handheld works well for a fast Q&A handoff. Plan for one primary mic, one backup transmitter, one spare mic at audio, and one handheld at Q&A. Label every transmitter and receiver, fit the presenter before doors open, and load fresh batteries. Scan RF 30–60 minutes before doors with venue systems turned on, and keep 1 MHz between adjacent channels, or 2–3 MHz in dense setups.
For camera coverage, map a wide master, a two-shot, a detail camera, and a Q&A angle. Keep operators out of the vehicle path. Route program, slides, and product close-ups to the confidence monitor so the presenter can see them without turning away from the audience.
For presenter marks, use discreet, high-contrast floor tape at the opening position, each feature stop, the camera-facing mark, the Q&A spot, and the exit path. Pair those marks with a short feature card - exterior, cabin, technology, safety, close-ups - and give matching copies to the stage manager, director, camera team, audio operator, and slide operator.
Section 3: Load-in logistics, labor calls, and back-of-house flow
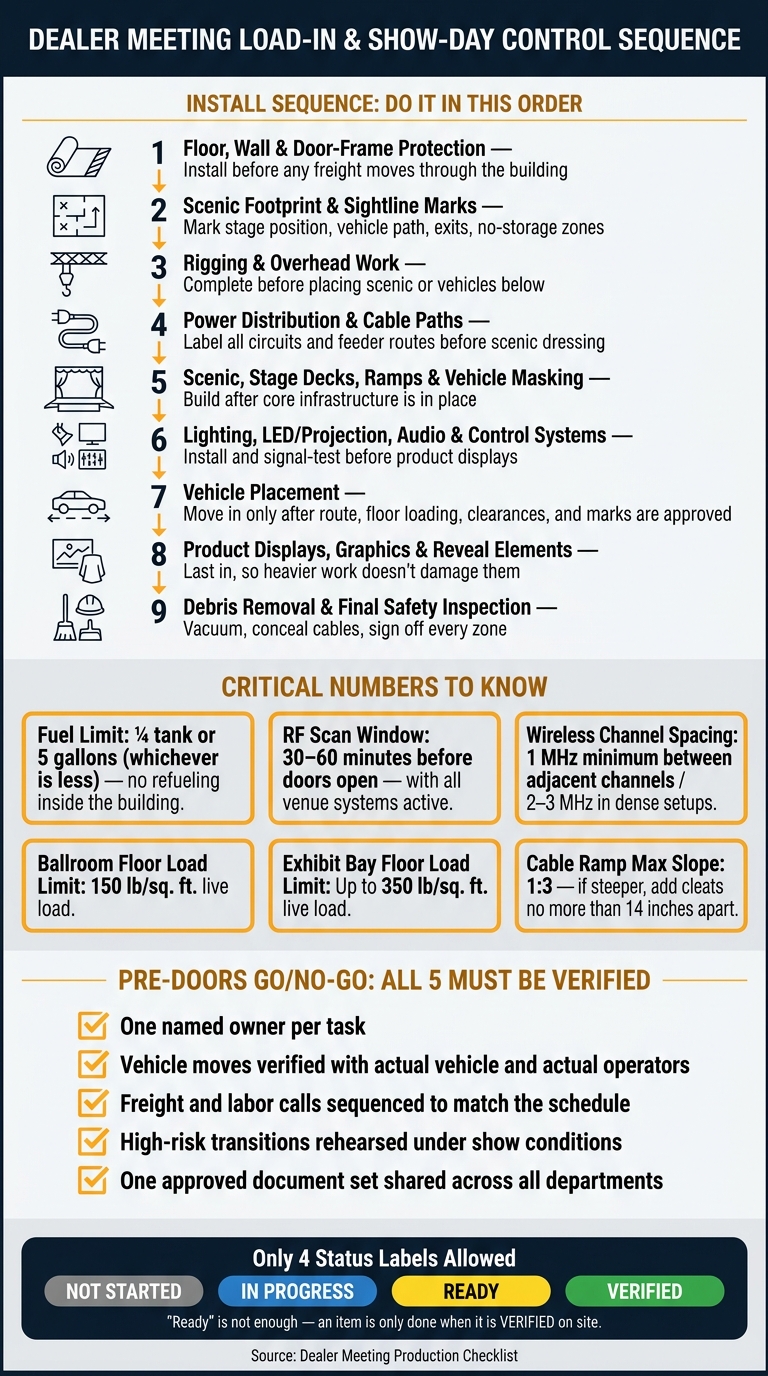
Dealer Meeting Production: 9-Step Load-In Sequence & Show-Day Checklist
Lock in dock access, freight schedules, and receiving control
Once the vehicle move is set, turn your attention to dock access, freight timing, and receiving control. This is where a smooth load-in either starts to take shape or starts to drift.
Before the first truck shows up, get every dock term in writing. Your dock plan should spell out the receiving address, dock access point, appointment windows, size and weight limits, marshaling rules, delivery deadlines, and handback time. You also need to confirm who controls dock access: the venue or the official drayage contractor. On top of that, verify whether direct-to-show deliveries are allowed and whether advance-warehouse receiving is an option. If venue traffic is tight, advance warehousing can ease dock congestion. And this isn’t just a freight issue. Dock timing affects reveal timing and walkaround readiness too.
Send each driver a one-page arrival sheet with the basics they need to avoid confusion:
- Venue address
- Show name
- Check-in procedure
- Drop-off zone
- Required paperwork
- Emergency contact number
Storage, redelivery, waiting-time, and overtime fees should all be listed in U.S. dollars, with the payer named ahead of time. No gray area. No last-minute finger-pointing.
At receiving, assign one person as the receiving lead. That person should log discrepancies, compare each arrival against the manifest, and release only matched freight. For every shipment, they should record arrival time, carrier, piece count, condition on arrival, and destination zone.
If a case arrives damaged, act before it gets moved. Take photos from several angles, note the damage on the bill of lading before signing, and place the case in a clearly marked hold area. Keep all packaging until the claim or repair call is settled.
Sequence the install to avoid bottlenecks and rework
Install order matters just as much as install quality. The sequence protects the reveal path, keeps the walkaround open, and stops teams from getting in each other’s way. Get it wrong, and you end up with buried cable runs, blocked access, and vehicles sitting where lighting still needs focus.
Use this sequence:
- Floor, wall, and door-frame protection - install this before any freight moves through the building.
- Scenic footprint and sightline marks - mark stage position, vehicle path, emergency exits, and no-storage zones on the floor.
- Rigging and overhead work - finish this before placing scenic pieces or vehicles below.
- Power distribution and cable paths - install and label the power source, disconnects, distro locations, circuit assignments, and feeder routes before scenic dressing starts.
- Scenic, stage decks, ramps, and vehicle masking - build these after the core infrastructure is in place.
- Lighting, LED or projection, audio, and control systems - install and signal-test these before product displays go in.
- Vehicle placement - move vehicles in only after route, floor loading, clearances, and marks are approved.
- Product displays, graphics, and reveal elements - bring these in last, so heavier work doesn’t damage them.
- Debris removal and final safety inspection - vacuum or mop floors, conceal or cover cables, and sign off every zone.
Every cable crossing in a pedestrian or equipment path needs a venue-approved cable ramp, floor cover, or overhead bridge. Ramps should be marked clearly while still keeping accessible routes open. Covered ramps must stay at a 1:3 maximum slope. If the slope is steeper, add cleats spaced no more than 14 inches apart.
This sequence also helps you time labor calls and release each back-of-house zone without chaos.
Manage labor calls, staging zones, and load-out order
Build labor calls backward from the venue handback time. That one move keeps the whole plan tied to the deadline that matters most.
Each labor call should include the start time, location, supervisor, headcount, task, required certifications, estimated duration, and the condition that releases the crew. Before you publish anything, confirm union jurisdiction, minimum calls, crew scopes, meal periods, and overtime thresholds. One late truck or one missed meal break can snowball into overtime costs that weren’t in the budget. Publish only labor calls that are fully confirmed.
Your back-of-house floor plan should split the space into clearly labeled, physically marked zones. At a minimum, include receiving, damaged-freight hold, inbound staging, build zones, empty-case storage, waste and recycling, presenter holding, and outbound staging.
A few rules matter here more than people think:
- Keep empty cases out of aisles, fire lanes, and exit paths.
- Apply empty-case stickers as soon as unpacking is done.
- Keep presenter holding physically separate from forklifts, moving scenic pieces, and active fabrication.
For strike, plan it before the show even opens. When doors close, the job shifts from live-show control to strike and outbound freight control. After the event, secure vehicles and back up show files first. Then strike in this order: products and presenter materials, media and show-control equipment, power and signal systems, audio/lighting/video/scenic elements, cable ramps and floor protection, vehicles, and outbound cases.
That order helps clear the venue in a clean, trackable way and keeps handback on course. Finish with a final sign-off that covers freight count, damage photos, venue condition, egress clearance, utilities, keys, credentials, and handback approval.
Section 4: Rehearsals, safety sign-off, and show-day control
Complete technical testing and safety checks before rehearsal
Once load-in is done, close the room and check every show-critical system before rehearsal starts. Finish these checks before presenter call time. The systems behind reveals, walkarounds, and the full conference flow need to be cleared before anyone steps on stage.
Use a sign-off sheet for every show-critical item, with one named owner for each one. Track pass/fail, time, and corrective action. Verbal approval doesn't count.
Start with audio. Check PA coverage and speech clarity across the full audience area, including rear seating and walkaround zones. Test every wireless microphone, spare beltpack, battery, and playback input. Wireless systems need an RF scan with all transmitters active at the same time, including intercoms and in-ear monitors. Then run a walk test across the stage and walkaround route to catch dropouts before they hit during the show.
Run the final show file from the show-control system. Check:
- Screens
- LED walls
- Confidence monitors
- Switchers
- Backup playback paths
Then light the stage from audience sightlines. Confirm blackout and reveal states. White-balance every camera from the final presenter marks and vehicle positions.
Safety sign-off should happen at the same time. Inspect cable ramps, stage edges, vehicle paths, rigging, and emergency exits. Verify lift certifications, operator authorization, and pre-shift inspection status. Make sure every worker, vendor, presenter, and driver has the right credential for their access level. Backstage, dock, vehicle, and restricted areas should each use a badge that looks different at a glance.
Brief all contractors on venue rules, emergency exits, no-go zones, and who has stop-work authority. Do not begin rehearsal until every hazard has an owner and a written disposition.
Run cue-to-cue, full rehearsal, and pre-doors review
Once safety is cleared, move into cue-to-cue. Run it in show order and stop after each high-risk transition so each department can check execution before moving on. Work through presenter entrances, mic handoffs, vehicle reveal timing, scenic movement, screen content, music starts and stops, walkaround camera framing, and end-of-segment resets.
Use the exact blocking planned for the reveal and walkaround. Rehearse the final standby and go calls, including any recovery cue if the vehicle misses its mark.
The full rehearsal should run straight through under the same conditions the audience will see: final show files, programmed lighting levels, presenter wardrobe, vehicle placement, and full communications. This is where you confirm total show length, speaker pacing, Q&A handling, and reset time between segments. Run one contingency drill for a failed critical system and document the fallback, skipped cue, and presenter notification. If the team uses a workaround that isn't written down yet, write it before doors.
Hold the pre-doors meeting only after the last approved technical and safety changes are in place. The show caller should review the first several cues, doors-open time, presenter locations, microphone assignments, radio channels, emergency procedures, and who can stop the show.
Set a hard revision cutoff here. After that, any change needs approval from the show caller and producer, and it must be marked on every affected copy. Place printed copies of the final approved documents at show calling, audio, lighting, video, and backstage positions. Keep offline copies on two devices.
Control the live show and document the handoff
After the pre-doors review, switch from testing to live control. The show caller is the single source of live cues. Audio, video, lighting, and stage management should not issue cues on their own.
Use separate radio channels for:
- Show calling
- Technical departments
- Venue or security operations
Publish the channel plan and label every beltpack. Use standby/go, acknowledge, and confirm. Keep nonessential talk off the show channel. Period.
During the show, log actual start times, delays, skipped cues, mic swaps, faults, and approved content changes. After each segment, reset microphones, playback, lighting states, scenic elements, and camera positions before confirming standby for the next segment.
At strike, secure show-critical assets first, then clear nonessential personnel from strike areas. Reconcile every case, radio, beltpack, microphone, camera accessory, and rented item against the packing list. Photograph any damage, note the time freight leaves the dock, and get signatures from the carrier, vendor, and venue representative.
Get written venue sign-off on room condition, freight departure, damage status, and open actions. Save the final annotated run of show, cue sheets, floor plans, radio plan, contact list, media inventory, incident log, and freight reconciliation in the event folder.
Conclusion: The checklist items that cut delays, errors, and show risk
When ownership, logistics, rehearsal, and show control are in place, a dealer meeting can still go sideways if just one piece slips.
The last go/no-go check is pretty simple. Before doors open, confirm these five things:
- One named owner per task
- Verified vehicle moves with the actual vehicle and the actual operators
- Freight and labor calls sequenced to match the event agenda
- High-risk transitions rehearsed under show conditions
- One approved document set shared across departments
Most delays don’t come from the main sessions. They come from the handoffs around them. That’s why reveal cues, walkaround resets, and presenter transitions need the closest attention.
It also helps to keep setup, rehearsal, show, and strike in separate time windows. That way, each phase gets checked off before the next one starts.
That kind of discipline keeps the show on time and the handback clean.
FAQs
Who should own the master run of show?
The production lead - often the show caller or Technical Director (TD) - should own the master run of show.
They call the live cues across audio, video, lighting, and stage. They also coordinate vendors and route updates through one command path, so load-in, show execution, and strike stay aligned.
What should be verified before moving a vehicle on-site?
Before moving a vehicle on-site, make sure it can physically get in and fit where it needs to go. That means checking dimensions and weight against every access point at the venue, including loading docks, freight elevators, ramps, and stage dimensions. You should also get written floor-loading data for both the vehicle and any staging tied to it.
Then check the safety rules. Confirm fire safety, fuel, and battery requirements with the venue and local authorities so there are no surprises on show day.
It also helps to have a clear movement plan in place, covering:
- Drive paths
- Speed limits
- Spotters
- Exclusion zones
When should technical checks be completed before rehearsal?
Complete technical checks before speaker walk-throughs and full cue-to-cue runs as part of a structured rehearsal sequence.
A full venue rehearsal is usually recommended 48 to 72 hours before the event. The full system, including backups, should be tested at least 24 hours before doors open.
Related Blog Posts
- 3 Tips How Production Companies Manage Logistics For Dealer Meetings
- 5 Production Companies Who Manage Logistics And Execution For Corporate Dealer Meetings
- Looking For An AV Production Team With Experience Producing Dealer Meetings? Look Into Corporate Optics. Read More To Find Out Why.
- How To Produce An Automotive Dealer Meeting: What Oems Need From A Production Partner.


Streamline your workflow, achieve more

Lorem ipsum dolor sit amet, consectetur adipiscing elit. Maecenas ac velit pellentesque, feugiat justo sed, aliquet felis.



Lorem ipsum dolor sit amet, consectetur adipiscing elit. Maecenas ac velit pellentesque, feugiat justo sed, aliquet felis.